This is the illustrated version of the world's greatest DIY printing tutorial.
Before You Start
The most important step in creating great freezer paper stencils is to make sure that you've got actual freezer paper. Most brands say "freezer paper" on the packaging; this is not the same as wax paper. The difference between freezer paper and the more common wax paper is that only one side of freezer paper is waxy. If both sides of your paper feel waxy then you will not be able to create a useable stencil. If you're unsure where to locate freezer paper of any of the other materials this tutorial requires, consult my resource guide.
Please note that this tutorial is meant for adults or older kids only. If you're under 15 and you'd like to try it out, ask an adult to help you with the more dangerous steps.
Here's a list of the materials you'll need:
- Freezer paper (remember, not wax paper)
- Black marker
- X-acto knife
- Envelope
- T-shirt, tote bag, bandana, or other fabric
- Fabric paint (or regular acrylic paint)
Step 1: Draw Your Image
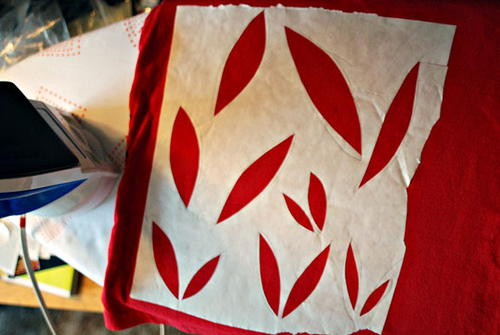
Place your freezer paper waxy side down on a flat surface and draw or trace the image you want to have on your shirt, bag, or bandana onto the non-waxy side of the paper. Then carefully fill in the outline with your black marker, leaving white space where appropriate.
In my example I've traced an image of leaves. Simple shapes without much detail work best for this method of creating prints.
Step 2: Cut Out Your Stencil
Using an X-acto knife (with adult supervision for younger kids), first cut out any white space that you've left in your drawing, reserving the cut outs in an envelope. Then proceed to cut the broad outline of your shape. You can discard any cut outs that have been colored in (the black areas of your drawing).
Step 3: Iron It On
First, place your stencil wax-side down onto the fabric you're using for your print. Then iron it securely to the fabric, pressing straight down on the iron with as much force as you can. Instead of moving the iron side-to-side as you would when normally ironing a shirt, pick it up off of the stencil and place it back down firmly. If you attempt to iron the stencil as you would iron a shirt you will peel parts of it off and prevent it from sticking securely to your fabric.
Now get out the envelope where you reserved the white cut outs. Place these pieces onto the fabric in the same location they occupied in your original drawing, then iron them to the shirt as well - pressing down very firmly and moving the iron as little as possible.
Step 4: Paint It
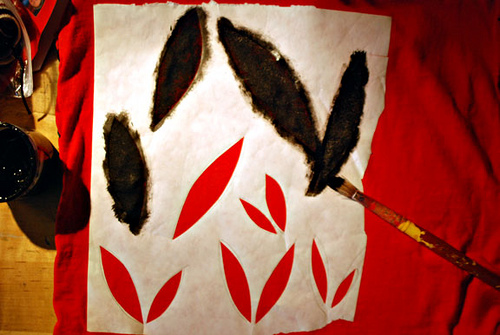
To prevent ink from leaking through one layer of your t-shirt or tote bag onto another, first place a piece of cardboard or a thick layer of newspaper under the fabric you will be painting onto. Then, using a regular paint brush to apply a layer of fabric paint or regular acrylic paint to the fabric not covered by the stencil. It's better to use the brush to dab the paint onto the stencil rather than paint with normal brush strokes. Make sure that you do not apply too much paint - a thin layer will suffice. If you apply too much the paint might run when you wash the shirt later.
Step 5: Watch the Paint Dry
Now you need to let the shirt sit for a while. It's very important to let the paint dry completely before attemping to remove the stencil. You can use a hairdryer to speed up the process if you're impatient.
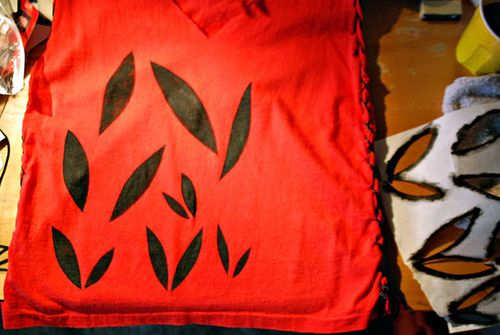
Once you've removed your stencil - doesn't it look pretty?? - you need to heat-set the paint. Do this by ironing the shirt over the printed area. Press the iron down on each section for at least 30 seconds with the iron set on high.
You're Done!
You can use this tutorial as many times as you'd like to create one-of-a-kind shirts, bags, and whatever else! Remember to clean up when you're done and always wear your creation with pride!